
xr/studio Documentation
Scenes
Add and organise scenes in your story. Learn the different scene types and when to use each one.
What scenes are
A scene is a self-contained space inside your story. Each scene has its own entities, settings, and timeline. Viewers move between scenes via navigation actions or automatically when one scene ends.
Adding and reordering scenes
Open the Scenes strip at the bottom of the editor and click + to add a new scene. Drag scene cards to reorder them. The first scene is what viewers see when the story loads.

- Open the Scenes strip (bottom of the editor).
- Click + Add Scene.
- Pick a scene type from the list.
- Drag scene cards in the strip to reorder.
Scene types
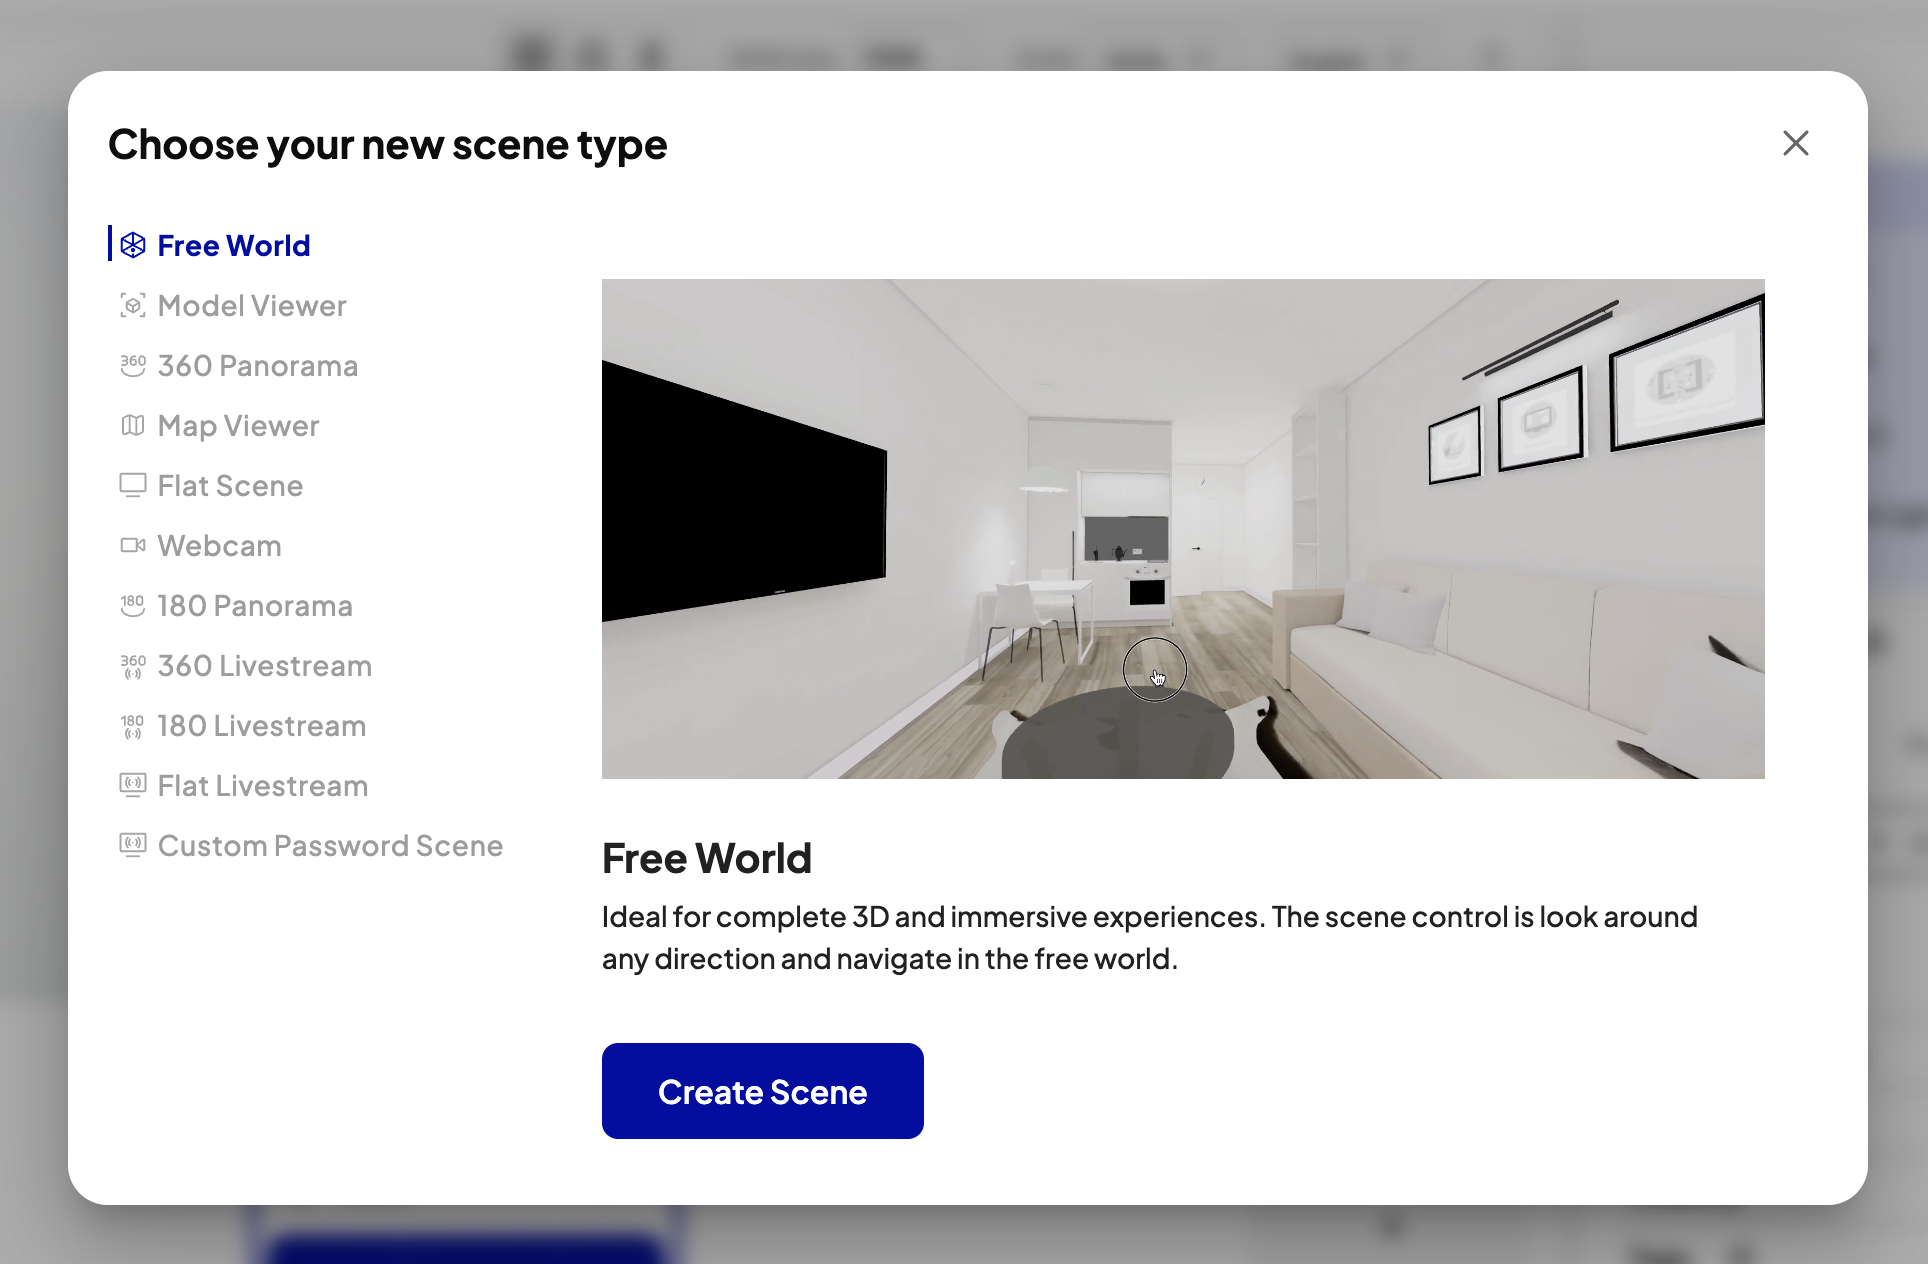
3D Scene: A fully interactive 3D environment. Place models, lights, cameras, and other entities freely. Best for product showcases, architectural walkthroughs, and any spatial experience.
360° Scene: A panoramic image or video fills the entire view. Users look around but cannot move. Best for virtual tours of real places, events, or spaces.
Map Scene: A geo-referenced map layer where you can pin 3D models and other entities at real-world coordinates. Best for location-based storytelling.
Webcam Scene: Shows the viewer's device camera, enabling QR code scanning and AR-style overlays. Best for interactive activations.
Image Tracking Scene: Shows content on a real image, such as a poster or a product box, when the viewer points the camera at it. Best for print, packaging, and posters. See Image Tracking.
Scene settings
Select the scene in the hierarchy (click the scene name at the top, not an entity inside it). The inspector then shows scene-level options: Scene Properties, Scene Effects, Visibility, Tags, scene actions, and more.
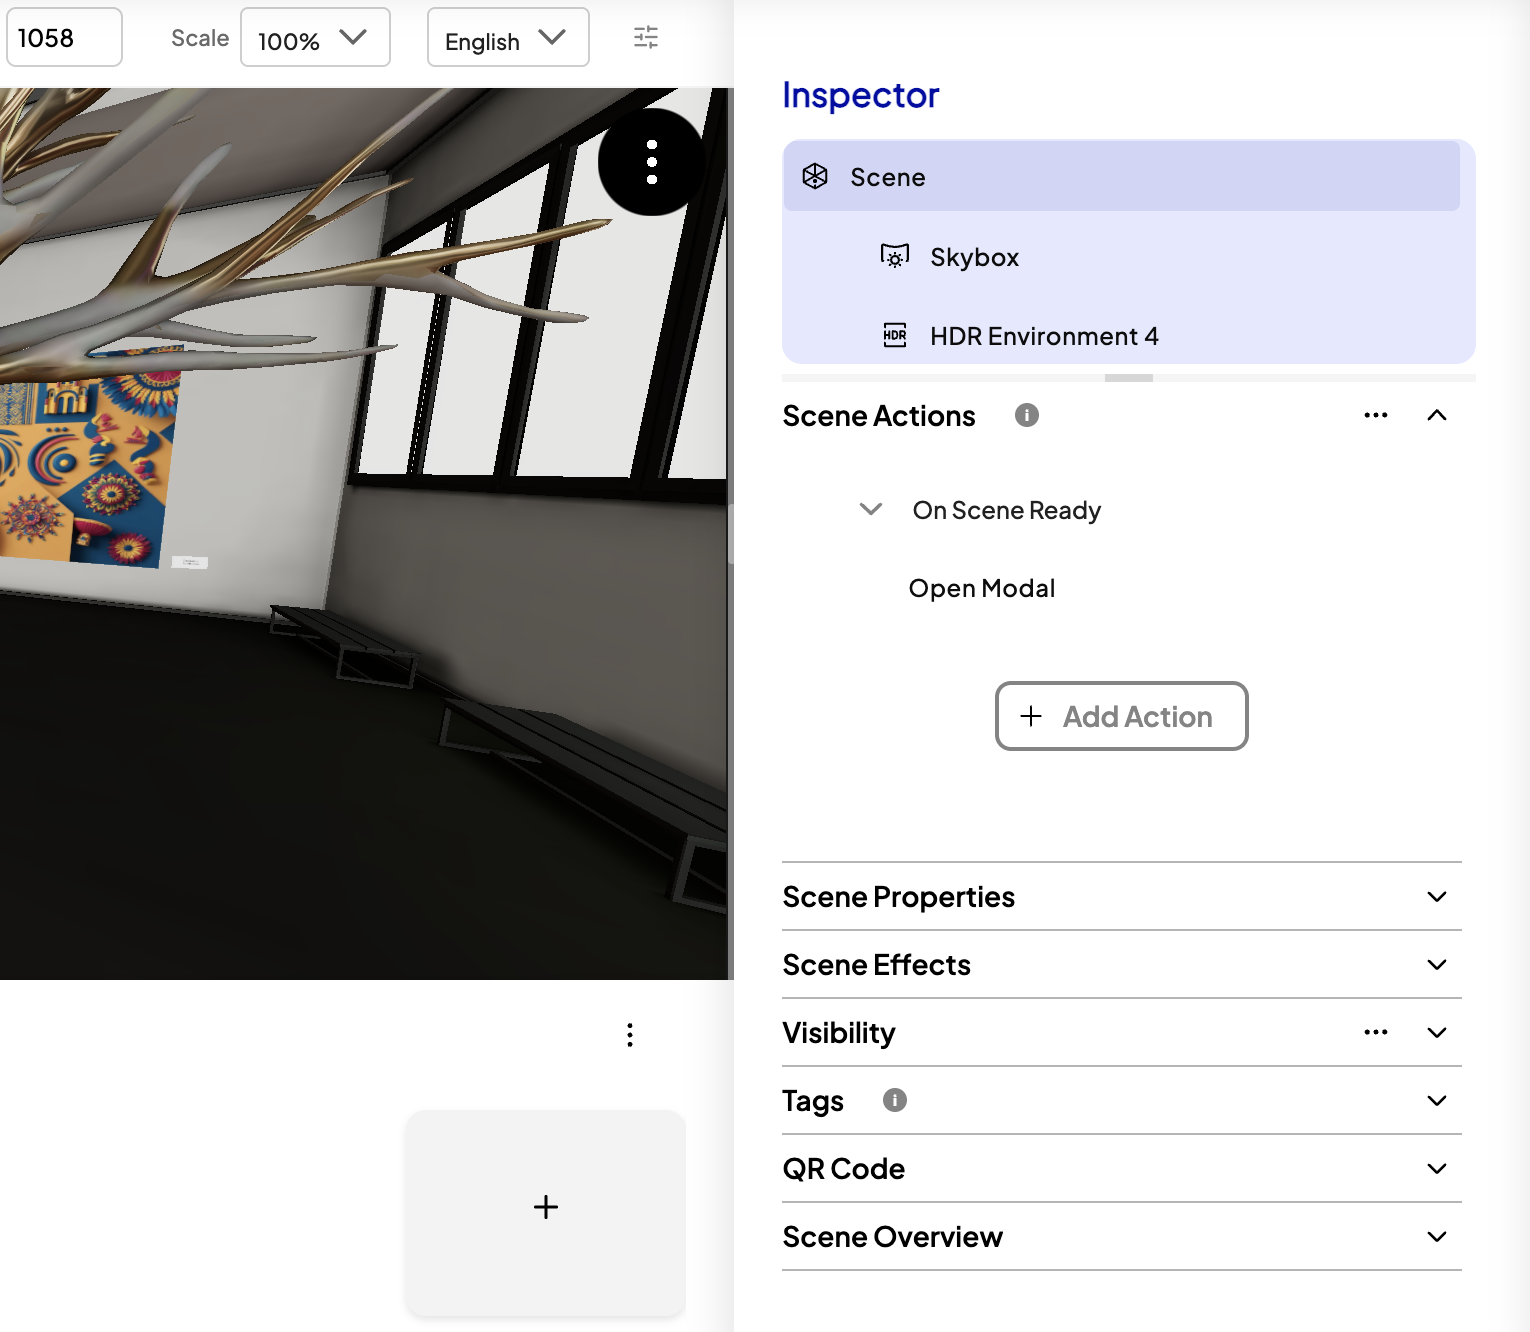
Background environment, physics, default camera, and per-language overrides live under Scene Properties and related sections.