
xr/studio Documentation
Image Tracking
Show content on a real image, such as a poster or a product box. Choose an image that tracks well, set its printed width, and start actions when the camera finds it.
What image tracking does
Image tracking shows content on a real image, such as a poster, a flyer, a product box, or a picture on a screen. The viewer points a phone at the image. The content appears on the image and stays on it while the phone moves.
Create an image tracking scene
- Open the Scenes strip at the bottom of the editor.
- Click + Add Scene.
- Select Image Tracking.
The new scene contains:
- an Image Target with a built-in marker image and a sample cube on it;
- lights and an HDR, so 3D models get reflections;
- a skybox, as a backdrop while you edit. Viewers do not see it. They see the camera image.
In the viewport, drag to orbit around the image and scroll to zoom, as in a Model Viewer scene.
Choose the image
Select the Image Target. In the Asset section, select the image that viewers will point at. Use the same file that you print or show on a screen. JPEG, PNG, and WebP images work. Transparent areas count as white, as on paper.
Check the tracking quality
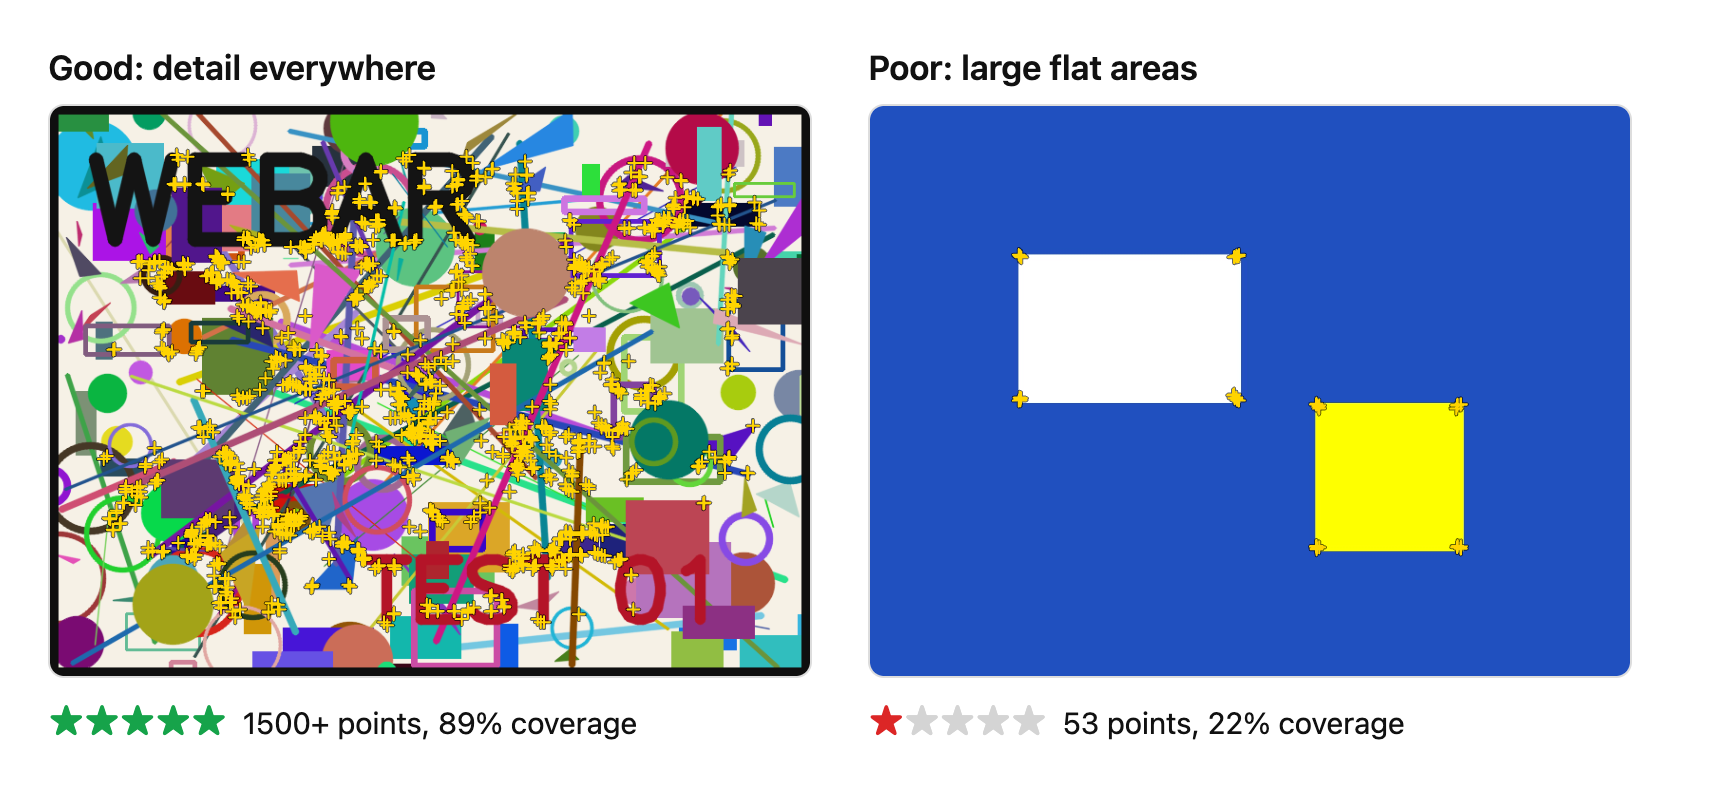
The Image Target section shows Tracking quality. It gives a star rating, the number of feature points, and how much of the image the points cover. xr/studio finds the points with the same detector that the player uses, so the rating matches what the viewer's phone sees.
Turn on Show feature points to see the points on the image in the viewport. The camera looks for these points.
| Rating | What to expect |
|---|---|
| ★★★★★ Excellent, ★★★★ Good | The camera finds the image fast and holds it, also at an angle. |
| ★★★ Fair | The camera finds the image when it fills a good part of the view. |
| ★★ Weak, ★ Poor | The camera finds the image rarely, or never. Use a different image. |
A good image has:
- Much detail. Photos and illustrations with texture, edges, and corners work best.
- No large flat areas. Simple logos, plain backgrounds, and text alone give few points.
- No repeated patterns. Grids, tiles, and stripes make the points hard to tell apart.
- Detail over the whole image. If the points are all in one corner, the image is lost when that corner is out of view.
- Strong contrast. Contrast helps more than many colours.
Set the printed width
In Printed width (cm), enter the real width of the image, as printed or as shown on the screen.
In AR, xr/studio uses this width to know how far away the image is. If the width is wrong, the content seems to slide when the viewer moves. On Android, the player measures the real size when the viewer moves the phone a little, and corrects the content.
The printed width is the scale of the target. Content inside the target grows and shrinks with it.
Add content to the image
Put the content inside the Image Target in the hierarchy. In this scene, new 3D content goes into the target, about 10 cm wide, on the image.
Content inside the target uses the image as its unit: 1 is the width of the image. The image lies flat, and up (Y) points out of the image.
You can move the target in the viewport, but you cannot rotate it. Its position is only for the editor: in the player, the camera places the target on the image. You can delete it, and add a new one from Add Entities, in the Advanced section.
Track several images
A scene can have more than one Image Target. Each target has its own image, its own content, and its own actions. To add a target, open Add Entities and drag Image Target from the Advanced section into the scene. Then select its image.
A new target goes to the right of the other targets. Move the targets apart if they overlap, so you can edit the content of each one. In the player, the camera places each target on its own image.
The camera can show up to three images at the same time. On iPhone, up to four. The guide shows all the target images, and tells the viewer to point at one of them.
Track a label on a can or bottle
A Cylinder Target tracks an image that goes around a can, a bottle or a cup with straight sides. To add one, open Add Entities and drag Cylinder Target from the Advanced section into the scene. You can also select an Image Target and set Shape to Cylinder.
Set two values in the inspector:
- Label width: the length of the printed label around the cylinder.
- Diameter: the diameter of the can, bottle or cup.
A new Cylinder Target has the size of a wine bottle front label: a 9 cm label on a 7.5 cm bottle. Change the two values to the size of your object.
The inspector shows how far the label goes around the cylinder. The image that you select must be the full label, flat, as it was before it went on the object.
In the viewport, the cylinder stands up. Up (Y) is the axis of the cylinder, and the label centre points to the front (Z). Put the content in front of the label or on top of it. Content at the centre is inside the object.
Android and Meta Quest track cylinder targets in AR. iPhone and iPad track only flat images, so they do not show the content of a cylinder target.
Extended tracking
Extended tracking sets what happens when the camera loses the image.
- Off: the content hides until the camera finds the image again.
- On: the content stays where the image was.
With extended tracking on:
- In AR (iPhone, Android, Meta Quest), the device tracks the room. The content stays in place while the viewer walks around.
- In a phone browser without AR, the gyroscope holds the content when the viewer turns the phone. Walking moves it. iPhone asks once for permission to use motion.
Start actions when the image is found or lost
Select the Image Target and open Actions. Use the event types On Target Found and On Target Lost. For example, play a video when the camera finds the image, and pause it when the camera loses the image. See Actions.
What viewers see
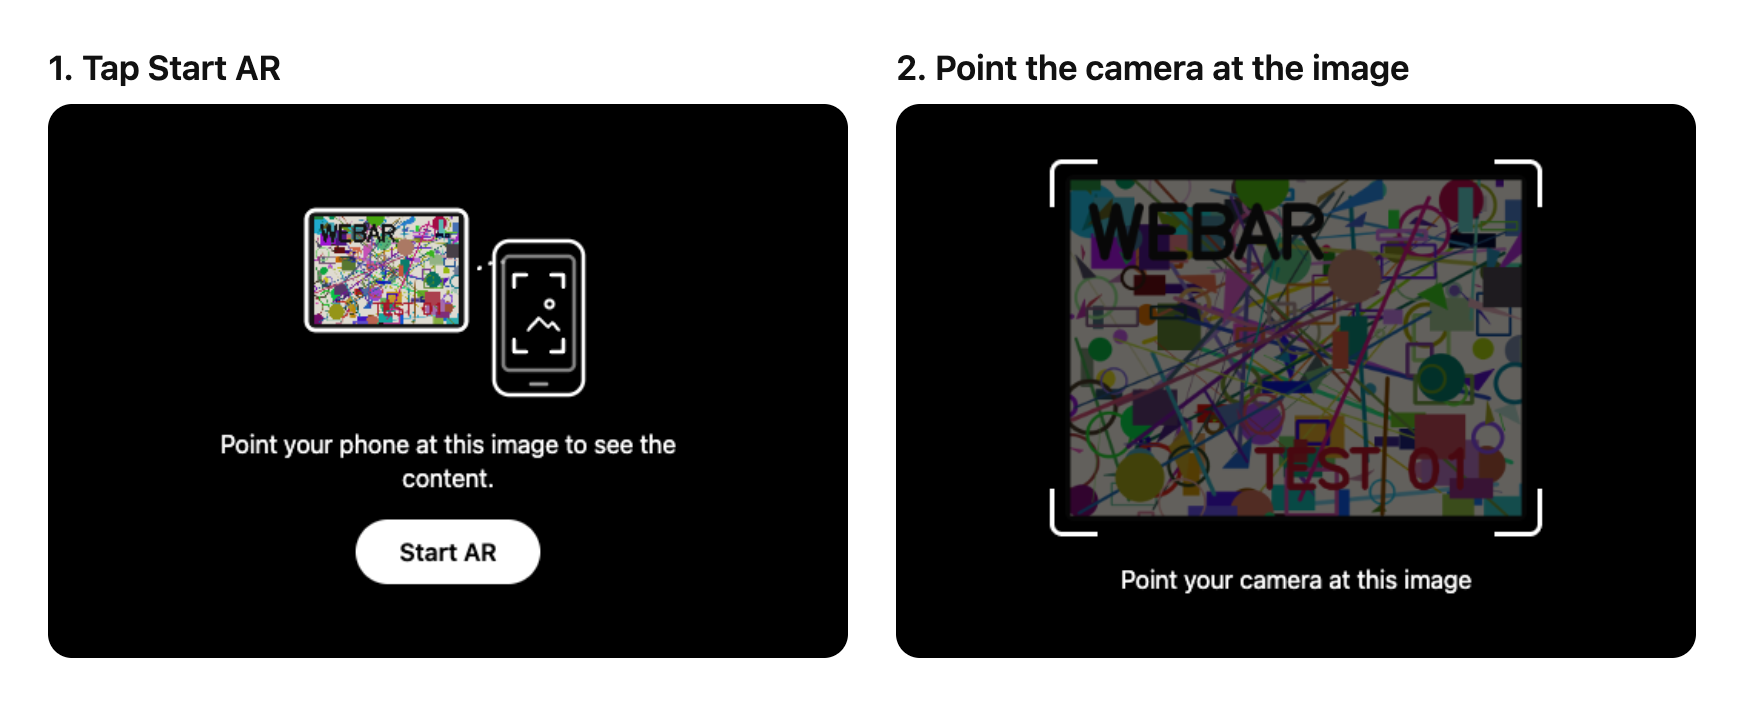
- The story shows a card with the image and a Start AR button.
- After the viewer taps Start AR, the camera opens. A see-through copy of the image shows in the centre, as a guide.
- When the camera finds the image, the guide goes away and the content appears on the image.
Devices
| Device | How image tracking runs |
|---|---|
| iPhone and iPad | Start AR opens the Cyango App Clip. The App Clip tracks the image with ARKit. |
| Android phones with ARCore (Chrome) | AR in the browser. |
| Meta Quest 3 and 3S | Immersive AR in Quest Browser. The first time, look at the image from a few angles for about 20 seconds. The headset measures where its camera is, and remembers it. |
| Computers and other phones | The camera image shows in the page, with the content on top. |
Viewers must allow access to the camera. Image tracking also works offline: when the viewer downloads the story for offline use, the tracker files are included.
Tips
- Light the image evenly. Avoid glare and deep shadows.
- Use a larger image for viewers who stand further away. A 20 cm print works well from about 30 cm to 1 m.
- On Android in AR, the camera focus is fixed. Very close images can look blurred. Use a larger image and step back a little.
- Images on screens work, but a print gives the steadiest result.